Hey everyone, and welcome back to the blog! As someone who’s spent the last 7 years running a residential furniture supply business, I’ve seen it all—from first-time homeowners panicking over a flat-pack bookshelf to renters frustrated with wobbly bedside tables. A lot of people think assembling furniture alone is a recipe for disaster, but trust me, it’s way simpler than it sounds. I put together this guide based on what I’ve taught my customers over the years, plus a few mistakes I made early on when I tried assembling my own dining table (spoiler: I spent an extra hour fixing a misaligned leg and still have a tiny scratch on my floor). Let’s dive in. Residential Furniture

First, let’s get one thing straight: assembling furniture by yourself doesn’t mean you have to be a DIY expert. It just means you need to be organized, take your time, and know what tools you actually need. I’ve had so many customers call me at 9 PM on a Friday, panicking because they forgot to grab a drill and their furniture kit has 12 tiny screws they’re fumbling to twist with their fingers. Don’t be that person. Let’s start with the prep work, because skipping this step is where 90% of the mess happens.
When your furniture gets delivered—wait, let’s make sure you actually unpack it right first. I always tell my guys (the delivery team) to leave the boxes in the room where the furniture is going to live. If you drag a heavy box across your hardwood floors, you’re gonna scratch ‘em, and that’s a quick way to ruin a new piece. Once it’s in place, take a second to clear the space around it. You don’t want to be crawling over a pile of shoes or a yoga mat when you’re trying to align a shelf. Next, open every box and lay out all the parts. I know, it looks like a pile of random pieces, but trust me: dump them out on a clean sheet or an old blanket (so you don’t lose tiny screws down the drain or under the couch) and group them. Separating wood panels from hardware from accessories is non-negotiable. I even like to line up the screws and bolts in little bowls or cups labeled with their size—nothing slows you down more than digging through a bag of 50 identical screws trying to find the right one.
Now, what tools do you actually need? You don’t need a whole garage full of gear. Most residential furniture kits we supply come with basic hardware, but you’ll want a few standard tools: a cordless drill (even a cheap one works way better than a manual screwdriver for long screws), a Phillips head screwdriver (in case a screw is too small for the drill bit), a rubber mallet (or even a rolled-up towel if you don’t have one—no need to scratch wood with a steel hammer), and a tape measure to double-check measurements. If your kit has dowels or tricky joints, a level is also super helpful to make sure everything’s straight as you go. Pro tip: keep a damp cloth nearby too—you’ll get sawdust or sticky residue from packaging tape on your hands, and wiping down panels as you assemble keeps the finish looking nice.
Once you’re prepped, it’s time to follow the instructions—but wait, not just read them once. I see so many people skip to the first step and then get halfway through when they realize they missed a whole step about inserting dowels. Instructions are your best friend here, and don’t be afraid to pause and go back if something doesn’t make sense. For example, when assembling a dresser, the first step is usually attaching the side panels to the bottom, not putting the drawers in right away. Rushing to put in drawers early on will just mean you have to take them out later when the frame is misaligned, and that’s a headache. Another thing: take photos of the instructions as you go if you need to. I’ve had customers text me a blurry phone snap of a page they missed, and half the time that’s enough to get them back on track.
Let’s talk about specific tips for common furniture pieces, since I know most of you are tackling a bookshelf, dresser, or dining table. For bookshelves: always tighten the screws on the top and bottom shelves first, then work your way to the middle. Middle shelves can shift if you tighten them too soon, so getting the outer ones aligned gives you a stable base. For dressers: the frame is the most important part. If the frame is wobbly, the whole dresser will be wobbly—no matter how hard you push. Double-check that each side panel is perpendicular to the base with a small level before you lock the screws in. And never skip the anti-tip kit—seriously, kids and pets love climbing on dressers, so taking 2 minutes to attach that wall mount is way better than dealing with a dangerous tip-over. For dining tables: if it has legs, attach one leg fully, then the opposite one, then the other two. That keeps the table balanced as you go, instead of trying to tighten all four legs at once and ending up with a lopsided table.
Now, the mistakes to avoid. Let’s start with over-tightening screws. I get it—you want your furniture to be sturdy, but cranking a screw so hard you strip the head or crack the wood is a waste of time. Most kits have a “stop” point for screws, so stop turning when it feels snug. Next, ignoring pre-drilled holes. Those little indentations in the wood are there for a reason—they keep screws from splitting the panel. If you force a screw into a spot without a pre-drilled hole, you might crack a brand-new piece. And finally, don’t rush. I’ve seen people finish assembling a desk in 20 minutes only to realize the top is leaning to one side, so they have to take the whole thing apart and start over. Set aside an hour, maybe two, depending on the piece, and don’t check your phone every 5 minutes. Focus, and you’ll have a perfect piece at the end.
Wait, what if something is missing or damaged? That happens sometimes, even with the best quality control (and we do 3 checks before our furniture leaves our warehouse). First, don’t panic. Check all the boxes again— sometimes screws fall into the bottom of a box or a small part like a knob gets tucked next to a panel. If it’s really missing, or you have a damaged wood panel, reach out to your supplier. For us, we make it easy—just send a photo of the damage or missing part, and we’ll ship a replacement right away, no hoops to jump through. That’s why it’s good to buy from a supplier that cares, not just a big box store that makes you fill out a 10-page form.
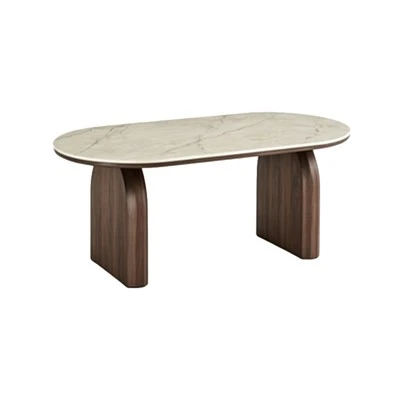
Now, let’s wrap this up with a quick recap. Assembling residential furniture alone is doable when you: 1) Prep your space and lay out all parts first, 2) Grab the 4 basic tools (drill, screwdriver, mallet, tape measure), 3) Read the instructions carefully and don’t skip steps, 4) Tighten screws snug (not too hard!) and use pre-drilled holes, 5) Don’t rush. If you’re in the market for new furniture, whether it’s a bedroom set, living room pieces, or a dining table, we’ve got a wide range of flat-pack options that come with super clear instructions and all the hardware you need. No stress, no hidden parts, just quality furniture that’s easy to put together. If you have questions, or want to chat about custom pieces or bulk orders for a rental property or small business, don’t hesitate to reach out to our team. We’re here to make furniture shopping and assembling as easy as possible for you.
Residential Furniture References
- Home Improvement Research Institute. (2022). Consumer Attitudes Toward DIY Residential Furniture Assembly.
- National Association of Home Builders. (2021). Best Practices for Flat-Pack Furniture Assembly.
- Consumer Product Safety Commission. (2020). Guidelines for Anti-Tip Hardware for Freestanding Furniture.
Bazhou Fuyuan Furniture Co., Ltd.
With abundant experience, we are one of the most professional residential furniture manufacturers and suppliers in China. Welcome to wholesale high quality residential furniture in stock here and get quotation from our factory. We also accept customized orders.
Address: Fuyuan Furniture Co., Ltd., Lane 2, Xinzhang Development Zone, Bazhou City, Langfang City, Hebei Province
E-mail: 17831088858@163.com
WebSite: https://www.fuyuanfurniture.com/
