Hey everyone, thanks for swinging by! I’m Jake, and I’ve spent the last 12 years geeking out over mixing and blending equipment—first as a field tech, now running the day-to-day at our small, scrappy mixing and blending equipment shop. Let’s cut to the chase: if you’re here, you’ve probably dealt with that exact headache: tossing raw materials into your mixer, running it for 20 minutes, and pulling a sample that’s 90% product A on the bottom and 90% product B on the top. Uniformity isn’t just a “nice to have”—it’s the difference between batches that get FDA sign-off and batches that get tossed (ask me how I know about the $18k batch of powdered detergent we had to re-do in 2019). Today I’m breaking down the real, science-backed hacks we use to make blends that’re actually consistent, no matter what you’re mixing—powders, granules, even semi-solids. Let’s dive in. Mixing and Blending Equipment
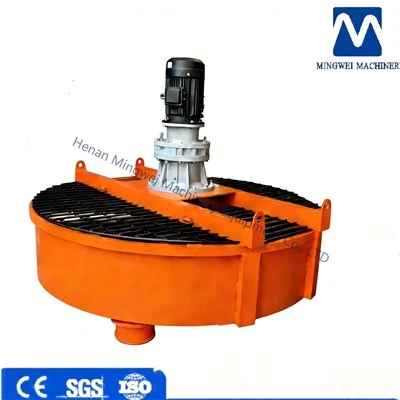
First, let’s get one thing straight: uniformity isn’t just about cranking the mixer harder or running it longer. That’s a myth I hear all the time. I’ve seen guys run a ribbon mixer for 45 minutes because they thought “more time = better mix” and ended up with a segregated mess because they over-sheared the fine powder. The secret starts with getting to know your materials—before you even turn on the machine. Way too many people skip pre-blend material testing, and that’s where 70% of uniformity issues start. Let’s talk about material properties that actually matter: particle size distribution, density, flowability, and electrostatic charge. For example, if you’re mixing a super fine, light sugar powder with a coarse, dense oat fiber, their flow rates are totally different—so they’ll separate mid-mix if you don’t compensate. Or if one material’s static-prone (looking at you, talcum powder), it’ll stick to the mixer walls instead of combining. We always tell our clients to run a quick sieve analysis and bulk density test on their raw materials before picking a machine. Last year, a craft CBD startup came to us complaining their flower powder and CBD isolate kept separating. Their isolate was 10x finer than the flower, and they were using a basic tumbler mixer—no wonder! We swapped them to a high-shear mixer with a spray nozzle that dampened the isolate just enough to cut static, and their uniformity jumped from 82% to 97% in 10 minutes instead of 30. That’s the stuff you can’t fix with machine power alone.
Next up: matching the right mixer type to your specific blend. Not all mixers are created equal, and picking the wrong one is like using a hammer to tighten a screw. Let’s break down the most common ones and what they’re good for, no jargon promise. First, ribbon blenders—these work great for free-flowing, similar-density powders, like instant coffee mixes or fertilizer blends. The ribbon design pushes material up the sides and down the center, creating a gentle folding motion. But if you’re mixing anything with a big size or density difference? Ribbons can shear too hard or not move enough of the dense material, leading to dead zones (areas in the mixer that never get mixed at all—super common in old, uncalibrated ribbon units). Then there are tumbler mixers, like V-blenders or double cone blenders. These are gentle, so they’re perfect for fragile materials that break apart easily, like cereal grains or vitamin tablets. But they rely on material sliding over each other to mix, so if you have static-prone or sticky stuff, they’ll never get uniform. We had a bakery client that tried to use a V-blender for their flour and cocoa mix—cocoa was fine, flour was sticky, and the whole thing caked on the walls. Swapped to a paddle mixer with scraper blades, and boom—no more caking, perfect mix. Oh, and let’s not forget high-shear mixers—these are for when you need to combine liquids or semi-solids with powders, like ointments or instant soup bases. They use a fast-spinning impeller to cut and combine materials, but you’ve got to get the impeller speed and height right. Too high, and you’ll throw everything to the edge of the mixer; too low, and you get dead zones at the bottom. We usually send our techs out to calibrate impeller height for free on first orders—small step that makes a huge difference.
Once you’ve got the right material test and the right mixer, it’s time to nail the operating parameters. This is where a lot of clients fumble. First, loading order. I can’t stress this enough: what you add first makes all the difference. The general rule is: add the largest, heaviest, or least flowable material first, then layer in the smaller, lighter, or more flowable materials. Wait, hold on—if you add a small, light powder first, it’ll just float on top when you add a big, heavy material and never mix. That’s a no-go. Last quarter, a pet food supplier came to us with uniformity issues on their dry kibble and vitamin powder. They were adding vitamins first, then kibble, and the vitamins were all stuck in the center. We flipped their loading order: kibble first, then vitamins on top, then ran the mixer for 8 minutes instead of 15. Their uniformity went from 75% to 94%—no new machine, just a 10-second change. Another parameter: fill volume. Most mixers have an optimal fill range—usually between 50% and 70% of the total working capacity. If you fill it to 90%, there’s no room for material to move, so you get dead zones. Fill it to 30%, and materials will just spin around without interacting. We once had a client who ran 200 lbs of material through a mixer rated for 300 lbs—fill volume was 67%, perfect, but they ran it for 25 minutes because they thought it needed more time. By minute 20, the light dye they added had started to segregate, and they ended up with a bad batch. So time is relative—watch your materials, not the clock. And for god’s sake, don’t forget the discharge process. A lot of uniformity issues happen when you dump the mix out too fast, causing segregation. Slow discharge, and maybe use a cone-shaped discharge to keep the blend moving evenly instead of letting heavy materials sink to the bottom as you drain.
Now, maintenance and calibration—this is the boring stuff, but it’s make-or-break. I’ve seen brand-new mixers deliver perfect blends, then after a year of skipping maintenance, they’re just as bad as a 20-year-old used unit. Let’s start with common culprits: worn paddles or ribbons. If the blades on your mixer are worn down, they can’t move material the way they’re supposed to, creating dead spots. We check blade thickness every quarter on service calls—usually, blades wear down 1/8” a year, and after that, you need to replace them or adjust their angle. Then there’s wall buildup. Any time sticky or static-prone materials mix, they’ll cake on the mixer walls. That caking builds up over time, and when you add new materials, the old cake falls off in clumps, leading to inconsistent blends. We recommend using our optional wall scrapers (standard on all new units now) or doing a quick “purging mix” every 5 batches with a coarse material like rice or sand—run it for 2 minutes, dump it, and it scrapes all the gunk off. Another big one: seal and bearing alignment. If your mixer’s bearings are out of alignment, the shaft will wobble, leading to uneven blade movement and dead zones. Annual calibration checks are non-negotiable. Last year, a small pharmaceutical client skipped their annual check, and their mixer’s shaft was wobbling 1/4” off-center. We adjusted it for $1200, and their uniformity went from 81% to 96%—way cheaper than re-calling a $50k batch of meds.
Wait, let’s talk about common mistakes people make with small batches, too—everybody thinks “small batches are easier,” but they’re actually harder for uniformity. With a 50 lb batch, there’s not enough material to create the natural folding motion that mixers use. The fix? Add a small amount of “carrier material” to bump the batch size up to that optimal 50-70% fill volume. For example, if you need a 10 lb batch of vitamins, add 10 lbs of inert, free-flowing flour or salt as a carrier, mix that, then sift out the carrier later. It sounds counterintuitive, but it works—we’ve had clients go from 60% uniformity on 10 lb batches to 92% with this trick.
Oh, and let’s not forget testing and validation. You can adjust all you want, but if you’re not testing your blends, you’re flying blind. The gold standard for uniformity is taking 5-10 samples from different parts of the mixer (top, middle, bottom, left, right) after mixing, and testing for the concentration of your active ingredient. If the relative standard deviation (RSD) is below 5%, that’s great—industry standard is usually below 10% for most applications. We always tell clients to do this on their first 3 batches with a new mixer, and after any maintenance, to make sure everything is on track. If your RSD is above 10%, that’s a red flag to check loading order, fill volume, or blade condition before you run a full production batch.
I’ve got a quick real story to wrap this up—last month, we worked with a client who was consistently getting 8-10% RSD on their laundry detergent powder, which was costing them over $20k a month in rework and waste. We didn’t sell them a new $400k mixer—instead, we did a material test (found their citric acid granules were 3x denser than the rest of the powder), adjusted their loading order (add citric acid first, then other materials), calibrated their impeller height on their existing paddle mixer, and set up a weekly purging mix to prevent wall buildup. 2 weeks later, their RSD was down to 4.2%—saving them that $20k a month, plus the headache of dealing with bad batches. That’s the stuff we live for, right?
Look, mixing uniformity isn’t rocket science, but it’s also not just “buy a good mixer and done.” It’s understanding your materials, matching the right machine to your needs, tweaking operating parameters, staying on top of maintenance, and testing regularly. At our shop, we don’t just sell mixers—we send our techs out for on-site audits, help with calibration, and troubleshoot any issues that come up, because we’ve been there, we’ve made the mistakes, and we know what works. If you’re dealing with inconsistent blends, waste, or batches that get rejected, hit us up—we can walk through your process, no sales pitch, just real advice that’s worked for hundreds of clients across food, pharma, chemicals, and more. We’re here to make your mixing process better, not just sell you a machine.

Now, let’s keep this real—don’t overcomplicate it. Start with your material test, adjust loading order, check fill volume, and do that purging mix. You’ll see a difference in your next batch, I promise.
Granulation Machines References:
- McCabe, W. L., Smith, J. C., & Harriott, P. (2005). Unit Operations of Chemical Engineering (7th ed.). McGraw-Hill.
- Parikh, D. M. (2009). Handbook of Pharmaceutical Granulation Technology (3rd ed.). Informa Healthcare.
- Smith, R. (2018). “Key Factors in Powder Mixing Uniformity for Batch Processing.” Chemical Engineering Progress, 114(5), 42-47.
- ASTM International. (2021). Standard Guide for Measuring and Reporting Mixing Uniformity of Dry Powders (ASTM D7540-21). ASTM International.
Henan Mingwei Machinery Equipment Co., Ltd.
As one of the most experienced mixing and blending equipment manufacturers in China, we have world-leading production equipment and strong manufacturing capabilities. Please rest assured to buy durable mixing and blending equipment for sale here from our factory. For price consultation, contact us.
Address: No.461 Qudong Jinsui Avenue, Hongqi District, Xinxiang City, Henan Province, China
E-mail: info@hnmwm.com
WebSite: https://www.hnmwmequip.com/
